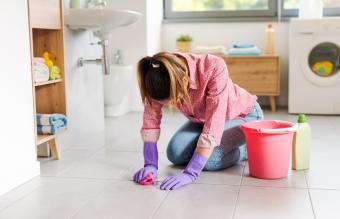
We all read about those weird cleaning hacks, but you've got to wonder if they actually work. Turns out, some do! We tested out a bunch of weird cleaning tricks to see what worked, what didn't work, and what was only kind of effective.
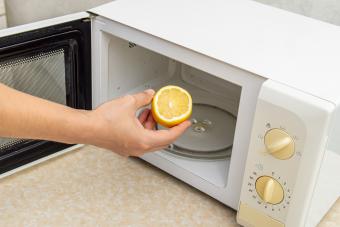
Karen Tried Cleaning a Microwave With Lemon
Effectiveness Grade: B+
What happens when you have a partner who refuses to nuke any of his food with even a paper towel covering it? A microwave that looks like this!
I know, I know. Ew! Imagine how I feel every time I open it (which isn't that often because blech). Over the years, I've tried a lot of different ways to clean the microwave, from using high-test cleaning products (meh) to microwaving vinegar and water (amazing), but I've never used lemon. After consulting TikTok wisdom, it turns out that the lemon cleaning hack is similar to the vinegar cleaning hack I already use, but it smells better while it's in process and afterwards.
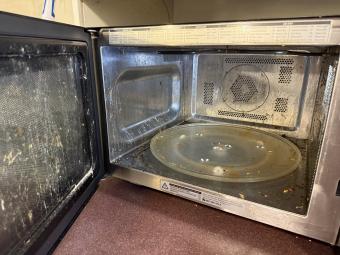
To do it, I sliced lemon, put it in a glass measuring cup with boiling water, and nuked it for five minutes like TikTok told me to do. Opening the microwave fogged up my glasses (occupational hazard), but it also did exactly what the vinegar and water hack does — softened up a ton of the gunk so I could wipe it away easily. Turns out that, for how gross my microwave was, five minutes of nuking the lemon water wasn't enough. I wiped a lot off in about 30 seconds, but there was still some challenging baked-on stuff that I couldn't just wipe away. Here's how it looked.
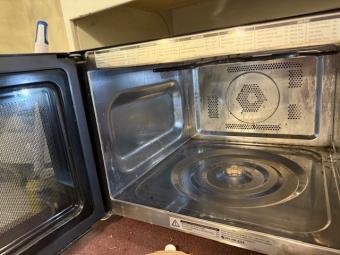
Better, right? All I did was wipe it with a microfiber cloth — still no scrubbing. So I microwaved the lemons and water for another five minutes. I was able to easily wipe out most of the gunk with a microfiber cloth, and I used an abrasive sponge to get rid of the rest.
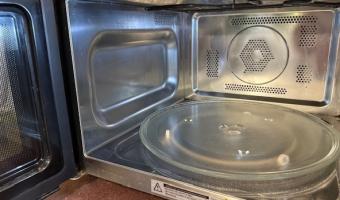
That was the end of the microwaving lemons. After this, I just attacked the most stubborn spots with a scrubber. All in all, my active work time was about five minutes (without the microwaving), and my hands smelled like lemons. I give this a B+. I still think the vinegar and water hack is more effective, but I like the way this one smells a lot better! I think if you did it every few days or once a week, it would be fast and easy to maintain.
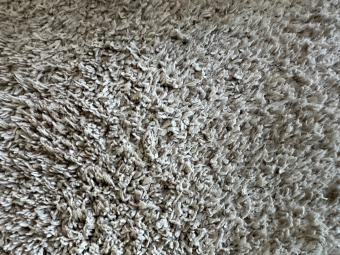
Carrie Tried Rubber Gloves to Get Rid of Pet Hair on Furniture
Effectiveness Grade: C+
I was pretty darn sure that this one would work — the rubber gloves should provide some “stick” to collect the pet hair (in my case, of the cat variety). Apparently, it works even better if you add a little water. Sure thing, let’s go!
I usually use a Chom Chom on my couch every day or so, but I let the hair collect a bit to really test this out. And to be honest, it works, but so does just using your hand. Allow me to illustrate.
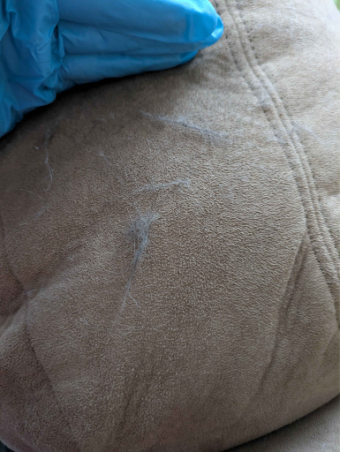
This is just with the glove alone, no water. The image I took with just a light mist of water is almost the same. The hair is coming up for sure, but you do need to sink some elbow grease into it.
However, this is what happens when you just use your hand and no glove.
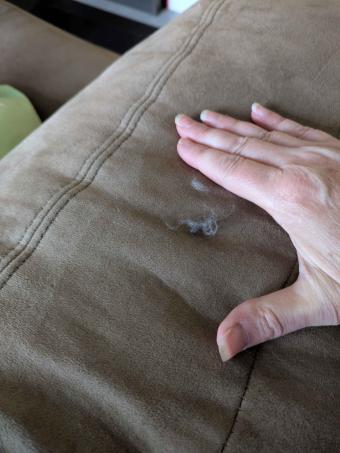
So I guess the glove works, but it isn’t super necessary. It might depend on what kind of fabric is on your furniture, so give it a try and see what your results look like. But a reusable pet hair roller is really a worthwhile investment.
Kate Used Dish Soap and Hydrogen Peroxide on Carpet Stains
Effectiveness Grade: A
First off, let me say that we are replacing our carpet soon, so I wasn't too concerned about trying things on the stains. And there are stains aplenty on this carpet, so it was easy to find a place to test this hack. I selected a dark stain in the dining room — probably courtesy of a kid with ADHD carrying his plate to the kitchen, getting distracted by something, and accidentally dumping his food on the floor.
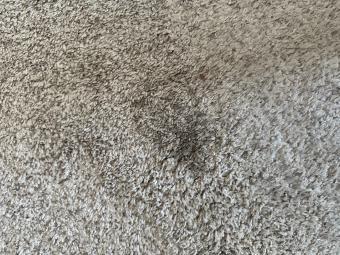
I mixed one part dish soap and two parts hydrogen peroxide in a cup and stirred it with a spoon. Then I just basically dumped it on the stain and grabbed a wet cloth to wipe it up. It was pretty sudsy, so I ended up rinsing it with some water, too. Here's where I found myself kind of shocked: the stain was gone! I didn't scrub or anything.
Note: The previously stained spot is now cleaner than the rest of the carpet around it.
I am honestly kind of amazed at how effective this was. I do have a concern, though: soap tends to attract more dirt if it's left on the carpet. Because I didn't use the carpet cleaner on this and just did it by hand, I would not be surprised if it gets dirty quickly. Still, this would be a really good option for pre-treating stains before cleaning the carpets.
Megan Polished Silver With Ketchup
Effectiveness Grade: A
As an avid antiquer and thrifter, I’m constantly looking for safe, natural ways to clean fragile items. One beautiful serving tray with glass inserts led me down a rabbit hole to the wonderful world of cleaning with ketchup.
Understanding how the acids in ketchup remove tarnish from silver and silver plate is above my scientific pay grade, but what I do know is that it works.
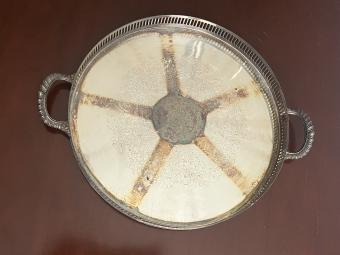
Coat your silver with a generous amount of ketchup, leaving it to work its magic for 30 minutes to a few hours. While you can just wipe it off and leave it there, scrubbing with a toothbrush can give it a much-needed cleaning boost.
Keep in mind that the level of tarnish will determine how many rounds of ketchup cleaning you have to go through to see a real impact. For example, certain areas of my tray’s interior cleaned up great after several vigorous ketchup cleaning sessions.
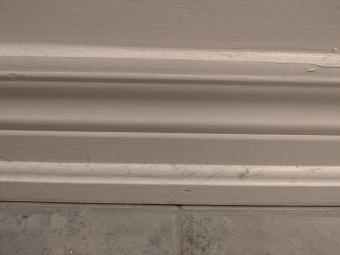
Carrie Cleaned Baseboards With a Dryer Sheet
Effectiveness Grade: A
This one has been around for a long time — I remember reading this tip in those homemaker magazines many years ago. I’m pretty sure my grandmother did this. The theory is that a dryer sheet will not only clean the dust off the baseboards but repel future dust from sticking to them.
Here’s the before shot — two cats means that there’s a lot of hair on the baseboards.
The dryer sheet was super easy to use, and I was really happy with the fact that the dust and cat hair actually stuck to the sheet. (I really hate when you’re cleaning something and the cloth is just moving the dirt around rather than picking it up.) So yes, if it’s just dust and hair that you’re cleaning, this is great.
If there’s actual dirt or something you need to wash off, then the dryer sheet isn’t going to clean that. You’ll still need to scrub that off.
Here’s what it looked like after one pass with the dryer sheet. And the room smelled great, too!
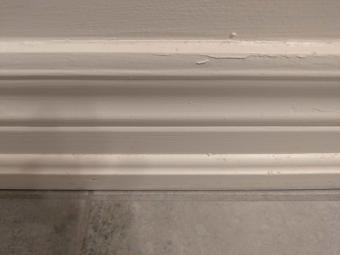
Did it repel dust and hair, though? I left it for three days, and… not really. There’s a new layer starting to build up right now.
Verdict: I’d probably do this again, but it’s no better than any other method.
Karen Used Coffee Filters to Clean Glass
Effectiveness Grade: D+
Another TikTok trend that’s gained some traction is using a coffee filter to clean glass. I tried it, and feel pretty meh about it. The coffee filter had a small surface area and was saturated quickly, and I had to buff with a second coffee filter to finish the glass. A paper towel or a microfiber cloth works just as well — probably better because of the size. So this isn’t a cleaning hack I’d use again — it seems like a waste of two perfectly good coffee filters.
Megan Cleaned Her Garbage Disposal With Ice
Effectiveness Grade: C
As a tried-and-true horror-movie-loving zillennial, many things give me goosebumps. Driving behind a log truck for one, and anything related to the garbage disposal. Naturally, I had to give this supposed hack for cleaning my garbage disposal a try.
Toss a few ice cubes down the hatch, run some cold water, and let your garbage disposal do all the work. It will sound like your garbage disposal’s trying to shoot off into space for a few seconds, but it doesn’t do any lasting damage…at least, it didn’t to mine.
While I can’t say for sure that the disposal looks any cleaner — me and my phalanges stay far away from that Saw trap waiting to happen — my disposal did run faster the next time I used it.
At the end of the day, this hack seems a bit more suited for dislodging food chunks and sharpening the blades than it does for overall cleaning, but for something that keeps me from putting my hand down the hatch, I’ll take what I can get.
Kate Tried Cleaning Grout With Toilet Cleaner
Effectiveness Grade: B
Years ago, I made the mistake of putting white grout on my bathroom floor. It's mosaic tile (did I mention this was years ago?), so there are a million tiny white grout lines. Well, they used to be white. Then I had two boys. Now my floor looks like this.

Every now and then, I get ambitious and get down on my hands and knees and scrub the floor, but it never looks perfect. I have tried all kinds of things over the years: specialized grout cleaner, Magic Erasers, Tilex, straight bleach, you name it. So I was keen to give this a shot.
I squirted toilet cleaner all over the grout and let it sit for a few minutes. Then I got to work with the grout brush.
Weirdly, this did actually work — kind of. The grout lines looked a lot better. But I also tried this around the toilet (two boys), and it was way less effective there. Trust me, you're glad I don't have before-and-after photos of that, but here's what the regular floor looked like afterward.
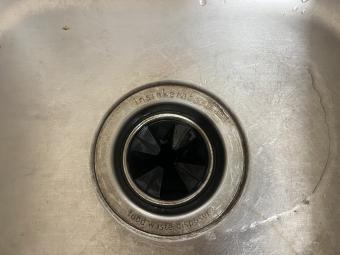
Carrie Used Flour to Clean a Stainless Steel Sink
Effectiveness Grade: D-
This is the one that I was both curious and skeptical about. It kind of makes sense — flour is slightly abrasive, but not enough that it would scratch the sink. The instructions that I found in a few different places were as follows:
- Clean your sink with whatever cleaner you usually use.
- Dry it completely — no water should be left anywhere, including around the drain.
- Sprinkle in the flour.
- Buff the sink with the flour using a dry paper towel or microfiber cloth.
So, okay. I can do this, but why am I buffing with flour after cleaning and thoroughly drying the sink? Will it be super shiny after? I’m kind of excited about this now!
Behold, my clean and very dry sink. Well, half of it.
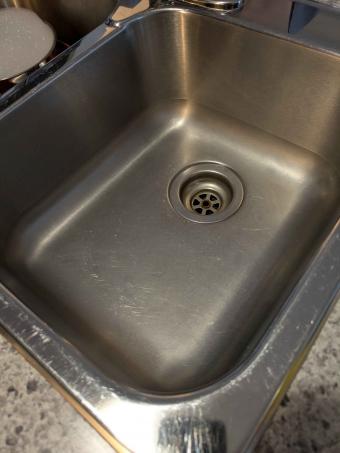
It’s pretty scratched up — funny how you don’t notice that so much until you see a photo. Anyway… time for the flour. None of the instructions I found said how much to use, so since I wanted to avoid making homemade glue in my kitchen pipes, I went for about a tablespoon and a half.
Buff buff buff. I did the whole shebang: bottom, sides, drain, you name it, it got buffed with flour.
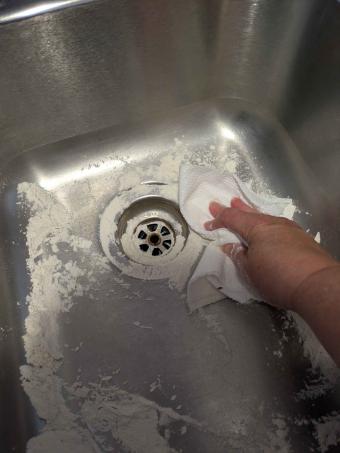
One of the places that had instructions for this said that I would see bits of food and stuff starting to come off, but honestly, if you have bits of food and other gunk still stuck to your sink after cleaning and drying it, maybe there are larger issues at play there.
Anyway, I removed as much of the flour as I could by scooping it back out and then rinsed the rest down the drain, and finally dried the sink one more time.
It looks the same. I can’t see any difference. Is it possible that the flour got into all of those scratches and cleaned out invisible goo? Sure, but I still don’t think it was worth the time and effort.
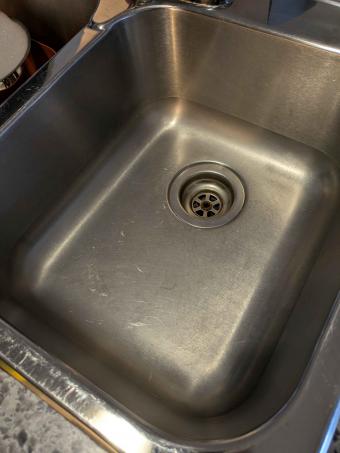
I guess if you have a lot of gunk or dried food in your sink, this might help to really get it clean. But I’m not sold. Save your flour and just clean it out the old-fashioned way.
Not All Cleaning Hacks Are Created Equal
Turns out, cleaning hacks can vary in their effectiveness. Some things are viral for a reason: they actually work. Others are just weird and don't really do much of anything. At least you know which ones to try now!